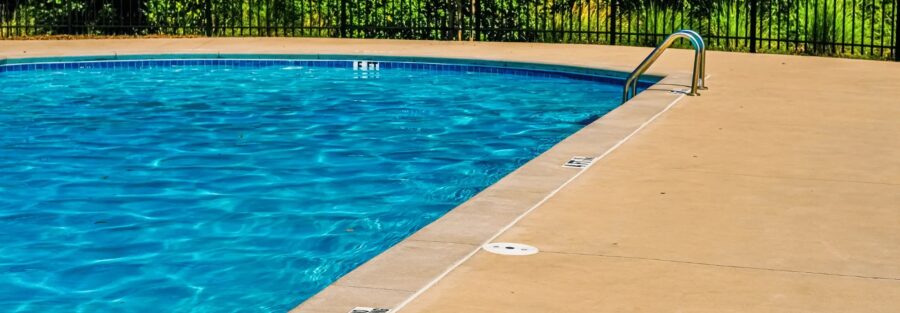
Resurfacing your pool deck is a transformative process that revitalizes and enhances outdoor spaces, making them more attractive and functional. Whether worn by years of exposure or simply outdated, a resurfaced pool deck not only renews the look of your pool area but also improves safety and durability. This guide will walk you through the benefits of resurfacing, the preparation and planning required, material choices, and the step-by-step process to achieve a stunning result.
Benefits of Pool Deck Resurfacing
Pool deck resurfacing offers a multitude of benefits that go beyond mere aesthetics. One of the most significant advantages is enhanced safety. Resurfacing materials often include non-slip properties that reduce the risk of accidents, especially when the deck is wet. Additionally, resurfacing can address issues like cracks and uneven surfaces, which can pose tripping hazards.
In terms of appearance, resurfacing provides an opportunity to completely transform the look of your pool deck. Modern resurfacing options come in a variety of finishes, textures, and colors, allowing you to tailor the design to complement your home’s style and the surrounding landscape.
Durability is another key benefit. High-quality resurfacing materials can withstand harsh weather conditions, pool chemicals, and heavy foot traffic. This longevity means that your pool deck will remain in excellent condition for years to come, making it a wise investment in both functionality and aesthetics.
Preparation and Planning
Proper preparation and planning are crucial for a successful pool deck resurfacing project. Begin by cleaning and preparing the surface. This involves removing any debris, dirt, and existing coatings that may interfere with the new surface adhering properly. Pressure washing the deck is an effective method for thorough cleaning, followed by repairs to any cracks or damaged areas.
Choosing the right materials and design is the next step. Consider the overall look you wish to achieve and the specific needs of your pool area. Whether opting for a simple concrete overlay or a more complex decorative finish, selecting the appropriate materials will ensure durability and aesthetic appeal. It’s advisable to consult with professionals or conduct research to make an informed choice based on your budget and design preferences.
Choosing the Right Materials
When it comes to resurfacing materials, there are several options, each with its own advantages and drawbacks.
- Concrete Overlays: These are popular for their versatility and cost-effectiveness. They can be stamped, stained, or textured to mimic more expensive materials like stone or tile. Concrete overlays provide a durable surface that can withstand the elements and high traffic but may require periodic sealing to maintain their appearance.
- Epoxy Coatings: Epoxy offers a sleek, modern finish and excellent durability. It’s resistant to stains, chemicals, and UV rays, making it a good choice for pool decks. However, epoxy can be more expensive and may require professional application for the best results.
- Spray Decks: This type of resurfacing involves a spray-on coating that creates a textured surface. Spray decks are slip-resistant and can be customized with various colors and patterns. They are relatively easy to maintain but may need touch-ups over time.
Each option has its own set of benefits, so it’s important to evaluate how each material aligns with your specific needs and budget before making a decision.
Step-by-Step Resurfacing Process
The resurfacing process involves several key steps to ensure a smooth and durable finish:
- Surface Preparation: Start by cleaning the deck thoroughly. Remove any existing coatings, repair cracks, and ensure the surface is dry and free of debris.
- Application of Base Coat: Apply a base coat if required by the chosen material. This layer provides a foundation for the new surface and helps with adhesion.
- Resurfacing Application: For concrete overlays, mix the resurfacing compound according to the manufacturer’s instructions and apply it evenly over the surface. For epoxy, mix the components and pour the epoxy onto the deck, spreading it with a squeegee or roller.
- Texturing and Finishing: Depending on the material, you may need to add textures or patterns while the surface is still wet. This can include stamping patterns into concrete or using tools to create desired textures.
- Sealing: Once the resurfacing material has cured, apply a sealant to protect the surface from moisture and UV damage. This step is crucial for prolonging the life of your resurfaced deck.
Maintenance Tips
To ensure the longevity of your resurfaced pool deck, proper maintenance is essential. Regular cleaning should be part of your routine to prevent the buildup of dirt and debris. Use a mild detergent and a soft brush or mop to clean the surface.
Avoid using harsh chemicals or abrasive tools that could damage the surface. For epoxy coatings or concrete overlays, periodic resealing may be necessary to maintain the protective layer and appearance.
Address any minor issues, such as small cracks or stains, as soon as they arise to prevent them from becoming larger problems. With proper care, your resurfaced pool deck will continue to enhance your outdoor space for years to come.
Resurfacing your pool deck offers a practical and aesthetic upgrade that rejuvenates your outdoor area. From enhancing safety and appearance to improving durability, the benefits are numerous. By following the outlined preparation, material selection, and application steps, you can achieve a stunning and long-lasting result. Whether you’re tackling the project yourself or hiring a professional, resurfacing is an investment in both the beauty and functionality of your pool deck.