Introduction
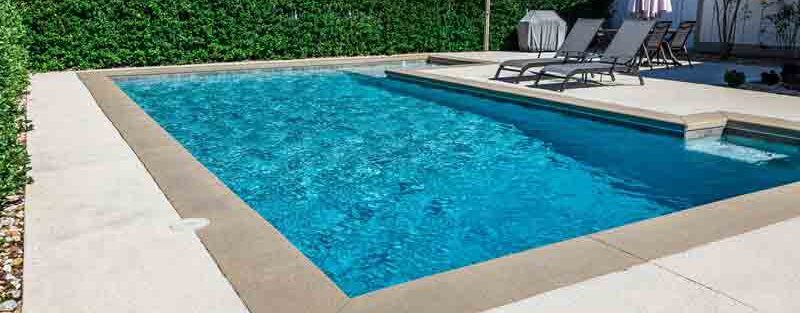
A pool deck is more than just a perimeter for your swimming area; it’s a sanctuary for relaxation and recreation. Over time, exposure to the elements and constant use can wear down the surface, making it unsightly and unsafe. Resurfacing your pool deck not only rejuvenates its appearance but also ensures a safe, durable, and enjoyable environment. This comprehensive guide will walk you through the meticulous process of pool deck resurfacing, from preparation to maintenance, ensuring your poolside stays pristine and inviting.
Benefits of Pool Deck Resurfacing
Resurfacing your pool deck offers a myriad of benefits that extend beyond mere aesthetics. First and foremost, it enhances safety by addressing cracks, holes, and uneven surfaces that can cause tripping hazards. A newly resurfaced deck also provides better slip resistance, especially when treated with textured coatings.
Aesthetically, a resurfaced pool deck can transform the ambiance of your outdoor space. It allows you to update the look with modern designs, patterns, and colors that complement your home’s exterior. Furthermore, resurfacing can increase the value of your property, making it more appealing to potential buyers.
Another significant advantage is the improvement in durability and longevity. High-quality resurfacing materials protect the underlying concrete from damage caused by water, chemicals, and UV rays, thereby extending the life of your deck. This proactive maintenance can save you money in the long run by preventing the need for more extensive repairs or replacements.
Preparation and Planning
Proper preparation and meticulous planning are crucial for a successful pool deck resurfacing project. Begin by thoroughly inspecting the existing surface. Look for signs of damage such as cracks, chips, and discoloration. Assessing the current condition helps in determining the extent of repair work required.
Once the inspection is complete, clear the deck area of any furniture, planters, or obstructions. Clean the surface rigorously using a pressure washer to remove dirt, algae, and old coatings. For stubborn stains, a degreasing agent may be necessary. Ensure the surface is dry before proceeding to the next steps.
Planning also involves deciding on the design and materials for resurfacing. Consider factors such as climate, usage patterns, and aesthetic preferences. It’s also prudent to check local building codes and regulations to ensure compliance.
Choosing the Right Materials
Selecting the appropriate materials is pivotal to the success and longevity of your resurfaced pool deck. Several options are available, each with unique benefits and aesthetic possibilities. Concrete overlays are a popular choice, known for their durability and versatility in achieving various textures and finishes.
Acrylic coatings are another excellent option, offering a non-slip surface that is ideal for wet areas. They come in a wide range of colors and can be applied in intricate patterns, providing both safety and visual appeal.
Epoxy coatings, while typically used for indoor surfaces, can also be suitable for pool decks in certain climates. They create a hard, glossy finish that is resistant to chemicals and water. However, they require a well-prepared surface and meticulous application to prevent peeling or bubbling.
For a more natural look, stone and tile overlays can mimic the appearance of materials like slate, travertine, or flagstone. These materials are not only visually striking but also durable and heat-resistant, making them comfortable for bare feet on hot days.
Step-by-Step Resurfacing Process
- Surface Preparation: Begin by repairing any existing damage. Fill cracks with an appropriate filler and patch larger holes with a cementitious patching compound. Smooth out these areas to ensure a level surface.
- Priming: Apply a primer designed for your chosen resurfacing material. The primer helps in bonding the new coating to the old surface, ensuring longevity and durability.
- Mixing the Resurfacing Material: Follow the manufacturer’s instructions for mixing the resurfacing compound. Use a drill with a mixing paddle to achieve a consistent mixture.
- Application: Pour the mixed material onto the deck and spread it evenly using a trowel or squeegee. For textured finishes, use a broom or a specialized roller to create the desired pattern. Work in sections to ensure even application and prevent the material from drying out before it’s spread.
- Curing: Allow the resurfaced deck to cure according to the manufacturer’s guidelines. This process can take anywhere from a few hours to a few days, depending on the material and weather conditions.
- Sealing: Once the surface is fully cured, apply a sealant to protect the new surface from stains, water damage, and UV rays. The sealant also enhances the color and finish of the resurfaced deck.
Maintenance Tips
Maintaining a resurfaced pool deck is essential for preserving its appearance and functionality. Regular cleaning is key; sweep away debris and wash the surface with mild soap and water periodically. Avoid using harsh chemicals or abrasive tools that can damage the finish.
Inspect the deck regularly for any signs of wear or damage. Promptly address small cracks or chips to prevent them from expanding. Reapply sealant as recommended by the manufacturer, usually every 2-3 years, to maintain the protective layer.
For areas with heavy use or exposure to harsh weather, consider adding a fresh layer of the resurfacing material every few years. This not only revitalizes the look but also ensures continued protection and slip resistance.
Conclusion
Resurfacing your pool deck is a worthwhile investment that enhances safety, aesthetics, and durability. By following a structured approach, from thorough preparation to diligent maintenance, you can transform your poolside into a stunning and secure oasis. Embrace the process and enjoy the myriad benefits of a beautifully resurfaced pool deck, providing a perfect backdrop for countless memorable moments.

